 admin1
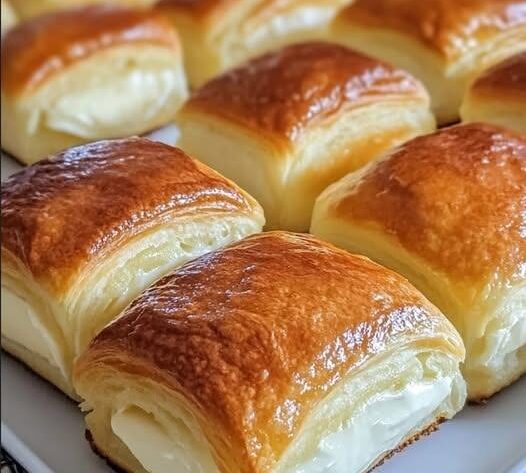
There is something irresistible about freshly baked pastry with a golden, glossy top and a soft, creamy center. These Cream-Filled Puff Pastry Breakfast Bites are inspired by the delicious pastries shown in the photo: beautifully browned on the outside, wonderfully flaky through the layers, and filled with a smooth, creamy mixture. They make an excellent breakfast treat, brunch pastry, afternoon snack, or simple dessert when you want something that looks bakery-worthy without complicated techniques.
The best part is the contrast in every bite. The pastry becomes crisp and golden during baking, while the creamy filling remains soft and rich inside. Served warm or chilled, these little pastries are an easy way to make an ordinary morning feel special. They are also perfect for sharing because each pastry is individually portioned and easy to serve.
Why You’ll Love These Creamy Pastry Bites
These pastries are ideal when you’re craving something sweet, buttery, and comforting. Using prepared puff pastry makes the process much easier because the dough already contains the layers needed to create that beautiful flaky texture. Once baked, the pastry puffs around the creamy filling and develops a deep golden-brown surface.
The filling is smooth and mildly sweet, making a lovely contrast to the crisp pastry. You can prepare the pastries in advance and bake them when needed, which makes them particularly useful for weekend breakfasts, brunch gatherings, or holiday mornings. They also look beautiful arranged on a serving platter, especially when lightly dusted with powdered sugar before serving.
Ingredients You’ll Need
To make these creamy puff pastry bites, you’ll need 1 sheet of puff pastry, thawed according to the package directions, along with 8 ounces of cream cheese, softened to room temperature. You’ll also need 1/3 cup powdered sugar, 1 teaspoon vanilla extract, and 1 egg yolk for the filling. For the pastry finish, use 1 egg beaten with 1 tablespoon of water to create an egg wash.
For an optional finishing touch, keep some powdered sugar available for dusting. The simple ingredients create a rich filling and beautifully browned pastry without requiring a long list of additions. If you prefer a slightly different flavor, a small amount of lemon zest can also complement the creamy filling, although the basic vanilla version is delicious on its own.
Preparing the Creamy Filling
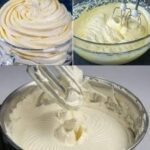
Begin by making the filling because it only takes a few minutes. Place the softened cream cheese in a mixing bowl and beat until smooth. Add the powdered sugar and vanilla extract, then continue mixing until the filling is creamy and evenly combined.
Add the egg yolk and mix just until incorporated. The finished filling should be smooth and thick enough to sit inside the pastry without immediately spreading. Softening the cream cheese before mixing is important because cold cream cheese can leave lumps in the filling.
If you want the filling to have a brighter flavor, you can add a small amount of finely grated lemon zest. For a richer pastry, the filling can remain exactly as prepared. The goal is to keep it creamy but not overly runny so that it stays neatly inside the puff pastry during baking.
Working With Puff Pastry
Puff pastry is easiest to handle when it is cold but flexible. If it becomes too warm, the butter layers can soften, making the dough sticky and difficult to work with. If your pastry starts feeling soft while you’re assembling the bites, place it in the refrigerator for a few minutes before continuing.
Lightly flour your work surface and gently unfold the pastry. Avoid pressing down too heavily with a rolling pin because you want to preserve the delicate layers that create the flaky texture. Cut the pastry into evenly sized rectangles or squares, depending on the shape you want.
Place a portion of the cream filling in the center of each piece, leaving enough space around the edges to seal the pastry. Avoid overfilling because the filling can escape during baking.
How to Assemble the Pastries
Once the filling is placed on the pastry, fold the dough over to create a neat parcel. Press the edges firmly with your fingers and then use the tines of a fork to seal them. A secure seal helps keep the creamy filling inside while the pastry puffs in the oven.
Arrange the prepared pastries on a parchment-lined baking sheet, leaving space between each one. This allows hot air to circulate around the pastries and helps the outside brown evenly.
For the glossy appearance shown in the photo, brush the tops lightly with egg wash. The egg wash encourages the pastry to develop that beautiful golden-brown color and gives the finished bites a bakery-style shine.
Baking Until Golden Brown
Preheat your oven to 400°F (200°C). Once the oven is fully heated, place the pastries inside and bake until they are puffed, flaky, and deeply golden. Depending on their size and your oven, this will generally take around 18–25 minutes.
Try not to open the oven door too frequently while they bake. Puff pastry relies on heat and steam to create its characteristic layers, so maintaining a consistent oven temperature is helpful.
Keep an eye on the pastries during the final few minutes. You want the tops to become a rich golden brown without burning. The edges should look crisp and well defined, while the pastry should have visibly expanded.
Let Them Cool Before Serving
Once the pastries come out of the oven, allow them to cool on the baking sheet for several minutes. The filling will be very hot immediately after baking, so giving the pastries time to cool makes them easier and more enjoyable to eat.
The pastry will also become slightly more stable as it cools. If you prefer a warm breakfast pastry, serve them after a short resting period. For a firmer cream filling, allow them to cool completely before serving.
A light dusting of powdered sugar adds an attractive finishing touch and a little extra sweetness. You can also serve the pastries with fresh berries or sliced fruit for a beautiful brunch presentation.
Tips for Flaky, Golden Pastries
The temperature of the puff pastry makes a big difference. Keep it refrigerated until you’re ready to use it, and work efficiently once it has been unfolded. If the dough becomes sticky or difficult to handle, chilling it briefly can make assembly much easier.
Don’t overload each pastry with filling. It can be tempting to add a generous spoonful, but too much filling can cause the seams to open during baking. A moderate amount creates a better balance between flaky pastry and creamy filling.
Make sure the edges are firmly sealed before baking. A fork is particularly useful because it creates a decorative pattern while reinforcing the seal. Finally, always bake puff pastry in a fully preheated oven for the best rise and browning.
Make-Ahead Breakfast Treat
These pastries can be especially convenient when prepared ahead. Assemble the filled pastry parcels, place them on a lined baking sheet, and refrigerate them until you’re ready to bake. Keeping the assembled pastries chilled helps maintain the puff pastry’s structure.
For a breakfast gathering, you can prepare the pastries the night before and bake them in the morning. Freshly baked pastries will fill the kitchen with a wonderful buttery aroma and can be served while still slightly warm.
If you have leftovers, store them in an airtight container in the refrigerator. To bring back some of the crisp texture, reheat them gently in an oven or toaster oven rather than relying solely on the microwave.
Perfect for Breakfast, Brunch, or Dessert
Although these pastries make a wonderful breakfast treat, they are versatile enough for almost any occasion. Serve them alongside coffee or tea for a relaxed morning, include them in a weekend brunch spread, or place them on a dessert table for a simple sweet option.
For entertaining, arrange the pastries on a white serving platter and dust them lightly with powdered sugar. Fresh berries can add a splash of color, while a cup of coffee or tea makes the presentation feel complete.
Their individual size also makes them convenient for parties. Guests can simply pick up a pastry and enjoy it without needing plates and forks.