Introduction:
In the world of culinary arts, few flavor combinations hold as much universal appeal as the marriage of sweet and savory. This taste profile capitalizes on a fundamental aspect of human sensory biology: our taste buds are hardwired to seek out sugars for energy and salts for electrolyte balance. When these two components are balanced correctly, they create a harmonious sensory loop that makes a dish nearly impossible to stop eating.
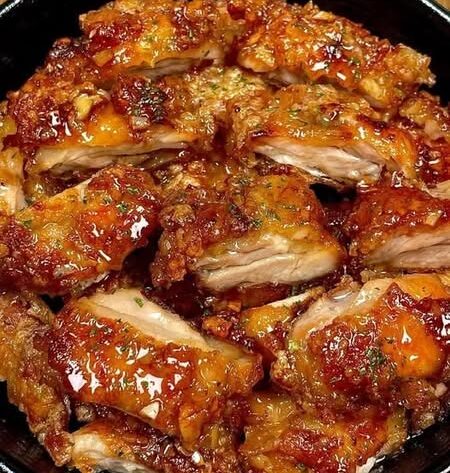
At the pinnacle of this flavor profile sits Honey Glazed Chicken.
Traditionally, achieving a perfectly glossy, deeply caramelized honey glaze required constant vigilance over a hot stovetop skillet or a slow-roasting oven pane. Honey contains high concentrations of natural fructose and glucose, sugars that begin to oxidize and burn at approximately $160^\circ\text{C}$ ($320^\circ\text{F}$). If left unattended for even a minute, a gorgeous glaze can turn bitter, black, and acrid.
This comprehensive 2500-word masterclass guide teaches you how to leverage the precision of the modern air fryer to bypass these traditional culinary traps. By utilizing controlled, high-velocity convection currents, the air fryer cooks the interior of the chicken to tender, juicy perfection while creating a beautifully rendered, caramelized outer crust.
Whether you are looking to prepare an efficient, high-protein weeknight dinner or looking to build a spectacular centerpiece for a weekend dinner party, this guide covers the structural food science, precise step-by-step mechanics, alternative flavor profiles, and troubleshooting matrices required to execute flawless honey glazed chicken every single time.
The Food Science of Glazing and Convection Cooking
To consistently achieve restaurant-quality results, it is vital to understand the physical and chemical interactions taking place inside your cooking appliance. The success of this recipe relies on three core scientific principles:
1. High-Velocity Convection Heat
An air fryer is essentially a compact, hyper-intensified convection oven. It features a high-output heating element paired with a powerful mechanical fan situated directly above the food chamber. This fan circulates super-heated air downward and upward through a perforated basket at speeds up to 40 miles per hour.
This intense air movement strips away the “boundary layer” of cool, humid air that naturally forms around raw meat, accelerating heat transfer exponentially. This rapid evaporation of surface moisture allows the chicken skin or exterior starch layer to crisp up in a fraction of the time required by a conventional oven.
2. The Mechanics of the Two-Stage Cook
Because honey burns easily due to its low thermal threshold, applying a honey-heavy glaze to raw chicken at the start of a 15-minute air-frying cycle is a recipe for disaster. Long before the deep internal layers of the chicken reach a safe pasteurization temperature, the sugar shell on the exterior will scorch.
To prevent this, this recipe utilizes a Two-Stage Cooking Strategy:
- Stage 1 (The Structural Par-Cook): The chicken is seasoned, lightly coated with oil (and optional starch), and air-fried at high heat until it is roughly 80% cooked. This sets the exterior crust and renders out excess subcutaneous fat.
- Stage 2 (The Glaze Setting Phase): The honey glaze is applied during the final 3 to 4 minutes of cooking. The temperature is slightly adjusted, allowing the sugars to rapidly dehydrate, bubble, and thicken into a mirror-like, sticky glaze without cross-linking into burnt carbon molecules.
3. Protein Denaturation and Intramuscular Moisture
Chicken meat consists of roughly 75% water trapped within a matrix of long muscle fibers. When exposed to heat, these proteins begin to denaturate—uncoiling and bonding together into a tight, solid matrix.
If chicken is overcooked, these fibers squeeze together so tightly that they force all the internal juices out, leaving the meat dry, chalky, and stringy. By monitoring the internal temperature with a digital thermometer and pulling the chicken out the exact moment it hits its safe target threshold, we preserve the structural integrity of the cells, keeping the chicken incredibly succulent.
Equipment and Kitchen Tools
Before beginning the cooking process, organize your workspace. Having your tools ready prevents cross-contamination from raw poultry and keeps your glaze applications timed perfectly.
- Air Fryer: A basket-style or toaster-oven style air fryer with a minimum capacity of 4 quarts to ensure adequate space between the chicken pieces.
- Instant-Read Digital Meat Thermometer: The single most critical tool in poultry cookery. It eliminates guesswork and guarantees juicy chicken.
- Silicone Pastry/Basting Brush: Essential for painting the thick honey glaze uniformly over the hot, par-cooked chicken without stripping away the seasoned crust.
- Two Large Mixing Bowls: One dedicated to the raw chicken prep and initial seasoning; the second dedicated to whisking the glaze ingredients together.
- Heavy-Duty Kitchen Tongs: For turning the hot chicken pieces safely without tearing the skin or flesh.
- Small Saucepan (Optional): Useful if you prefer to gently heat and reduce your glaze prior to painting it onto the meat.
Ingredients Master List
This recipe is built on accessible, high-impact pantry staples that lock in maximum flavor.
The Chicken Foundation
- 1 kg (approx. 2.2 lbs) Chicken Thighs or Drumsticks: Bone-in, skin-on chicken cuts are highly recommended for this recipe. The bone acts as an insulator, preventing the center of the meat from drying out, while the skin provides a natural layer of fat that crisps beautifully under convection heat.
- 1 tablespoon High-Smoke-Point Oil: Avocado, grapeseed, or light olive oil. Avoid extra-virgin olive oil, as its low smoke point can cause it to smoke and taste bitter at high temperatures.
- 1 tablespoon Cornstarch (Optional): Tossed with the dry seasonings, this creates an ultra-crisp exterior matrix that gives the honey glaze something textured to cling to.
The Dry Rub Aromatics
- 1 teaspoon Garlic Powder
- 1 teaspoon Onion Powder
- 1 teaspoon Smoked Paprika (provides a beautiful baseline color and woodsmoke aroma)
- 1 teaspoon Fine Sea Salt
- 0.5 teaspoon Coarsely Ground Black Pepper
- 0.25 teaspoon Cayenne Pepper (for a very subtle background warmth that balances the sweet honey)
The Signature Honey Glaze
- 0.25 cup (approx. 60 ml) Pure, Unfiltered Honey: Clover or wildflower honey works beautifully.
- 2 tablespoons Low-Sodium Soy Sauce: Adds a foundational savory salt layer and deepens the dark amber color of the glaze.
- 1 tablespoon Apple Cider Vinegar: The necessary acid element that cuts through the cloying sweetness of the honey and brightens the overall flavor profile.
- 1 clove Fresh Garlic: Finely grated or pressed into a smooth paste.
- 1 teaspoon Fresh Ginger: Finely grated (adds a bright, sharp, peppery punch).
Step-by-Step Instructions
Follow this blueprint systematically. The timings provided below are calibrated for medium-sized bone-in chicken thighs.
[Prep & Season Chicken] ➔ [Air Fry at 190°C - Stage 1] ➔ [Whisk Honey Glaze] ➔ [Baste with Glaze - Stage 2] ➔ [Check Internal Temp] ➔ [Rest & Serve]
Step 1: Cleaning, Drying, and Trimming
- Remove the chicken thighs from their packaging. Lay them flat on a cutting board lined with paper towels.
- Using a sharp knife, trim away any excessive flaps of loose fat hanging off the edges of the thighs. Keep the skin covering the top surface fully intact.
- Take a fresh paper towel and firmly pat the surface of each chicken piece until it is completely dry.
Chef’s Note: If moisture remains on the skin, the oil and seasonings will slide off, and the initial air-frying stage will steam the skin instead of crisping it.
Step 2: Applying the Dry Rub
- Place the dry chicken thighs into your first large mixing bowl.
- Drizzle the 1 tablespoon of high-smoke-point oil over the chicken. Use your hands to massage the oil over every inch of the skin, bone, and flesh.
- In a separate small bowl, combine the garlic powder, onion powder, smoked paprika, sea salt, black pepper, cayenne pepper, and cornstarch. Whisk until the spices are evenly distributed.
- Sprinkle the dry rub over the oiled chicken. Toss vigorously until the chicken pieces change color completely, showing an even coating of the brick-red spice blend.
Step 3: Stage 1 Cooking (The Par-Cook)
- Preheat your air fryer to $190^\circ\text{C}$ ($375^\circ\text{F}$) for 4 minutes.
- Arrange the seasoned chicken thighs inside the air fryer basket in a single layer. Ensure the pieces are skin-side down to start.
The Spacing Rule: Leave a minimum of a 0.5-inch gap between each chicken piece. If the thighs are crammed tightly against one another, the hot air cannot circulate around the vertical edges, leaving those spots soft and pale. If necessary, cook in separate batches.
- Slide the basket into the air fryer and set the initial timer for 12 minutes.
- At the 6-minute mark, pull the basket out. Using your heavy-duty kitchen tongs, flip each chicken thigh so that they are now skin-side up. Slide the basket back in to complete the remaining 6 minutes of Stage 1.
Step 4: Constructing the Honey Glaze
- While the chicken is executing its initial cook cycle, prepare the glaze.
- In your second mixing bowl, combine the honey, low-sodium soy sauce, apple cider vinegar, grated fresh garlic, and grated fresh ginger.
- Whisk the mixture vigorously for 60 seconds until the honey has fully dissolved into the liquid elements, creating a uniform, amber-colored syrup.
Step 5: Stage 2 Cooking (The Glaze Application)
- When the initial 12-minute timer rings, open the air fryer basket. The chicken skin should look golden-brown, bubbly, and partially crisp.
- Dip your silicone pastry brush deep into the honey glaze. Paint a generous, thick layer of the glaze over the top skin-side surface of each chicken thigh. Do not be afraid to let some glaze drip down the sides into the basket.
- Close the air fryer basket. Drop the cooking temperature slightly to $180^\circ\text{C}$ ($350^\circ\text{F}$). Set the timer for 4 minutes.
- At the 2-minute mark, open the basket again. The glaze should be bubbling violently on top of the skin. Paint a second layer of honey glaze directly over the first layer to build up a deep, glossy lacquer. Close the basket and let it finish the final 2 minutes.
                   GLAZING CHECKLIST
 [ ] Internal chicken temp checked before glazing?
 [ ] Temperature lowered to 180°C to protect sugars?
|[ ] First layer painted on evenly across all skin surfaces?
 [ ] Second layer applied at 2-minute mark for lacquered look?
Step 6: Thermal Verification and Resting
- Once the timer finishes, pull the basket out completely.
- Insert the probe of your digital meat thermometer into the thickest part of the chicken thigh, taking care not to let the metal tip touch the bone, as bones conduct heat differently and will give an inaccurate reading.
- The thermometer should read a minimum of $74^\circ\text{C}$ to $79^\circ\text{C}$ ($165^\circ\text{F}$ to $175^\circ\text{F}$).
Note: While chicken breasts are optimal at $165^\circ\text{F}$, dark meat cuts like thighs contain dense connective tissue (collagen) that breaks down into rich gelatin at slightly higher temperatures ($175^\circ\text{F}$), making them even more tender.
- Transfer the glazed chicken thighs to a clean platter. Let the meat rest for 5 minutes before carving or serving. This resting window allows the agitated muscle fibers to relax and reabsorb their internal juices, ensuring every bite is moist.
Advanced Flavor Variations
Once you master the base honey-soy blueprint, you can adapt the glaze chemistry to create completely different international culinary profiles.
1. The Hot Honey Habanero (For the Heat Lovers)
A fiery, bold variation that pairs beautifully with cold side dishes.
- Glaze Adjustment: Replace the soy sauce and ginger with 1 tablespoon of your favorite hot sauce and 1 teaspoon of crushed red pepper flakes. Stir 0.5 teaspoon of ground cayenne pepper directly into the honey. Once the chicken is plated, finish with a light scatter of sliced pickled jalapeños.
2. Sticky Honey Garlic-Barbecue (The Smokehouse Classic)
A thick, rich glaze that mimics slow-smoked southern barbecue.
- Glaze Adjustment: Mix 0.25 cup of standard smoky barbecue sauce with 2 tablespoons of honey and 3 crushed garlic cloves. Omit the vinegar and ginger. This creates a highly viscous glaze that caramelizes into a deep mahogany crust in the air fryer.
3. Orange-Blossom Honey Sesame (Asian Bistro Style)
A sweet, aromatic profile with bright citrus highlights.
- Glaze Adjustment: Whisk together 0.25 cup of honey, 1 tablespoon of fresh orange juice, 1 teaspoon of orange zest, 1 tablespoon of soy sauce, and 1 teaspoon of toasted sesame oil. The moment the chicken comes out of the air fryer, shower it with toasted white sesame seeds and finely sliced green onions.
4. Honey Mustard and Thyme (The European Herb Variant)
A tangy, complex profile that offers an elegant twist on standard honey chicken.
- Glaze Adjustment: Combine 2 tablespoons of Dijon mustard, 2 tablespoons of whole-grain mustard, 3 tablespoons of honey, and 1 teaspoon of fresh thyme leaves. This variation does not use soy sauce, resulting in a beautiful golden-yellow glaze with an herbaceous aroma.
Comprehensive Dipping Sauces and Side Pairings
To transform your air-fried honey glazed chicken into a complete, balanced meal, pair it with complementary textures and clean flavor notes that cut through the richness of the glaze.
The Best Side Pairings
- Garlic-Herb Jasmine Rice: The clean, aromatic profiles of jasmine rice act as a perfect sponge for absorbing any extra sweet honey glaze that runs off the chicken.
- Air-Fried Sesame Broccoli: Toss broccoli florets in a tiny splash of sesame oil and sea salt. Air-fry them at $200^\circ\text{C}$ for 6 minutes alongside or after the chicken for a fast, nutrient-dense green side.
- Crispy Ginger-Soy Cucumber Salad: Thinly sliced English cucumbers tossed with rice vinegar, a drop of soy sauce, sugar, and toasted sesame seeds. The cold, crisp, acidic snap of the cucumbers provides an excellent contrast to the warm, sticky chicken thighs.
The Ultimate Drizzle Sauce
If you have leftover glaze remaining in your prep bowl that did not touch the raw poultry, pour it into a small saucepan. Bring it to a boil over medium-high heat for 2 minutes to sterilize it and reduce it into a thick, pourable syrup. Drizzle this intensified reduction over your plated chicken and rice right before serving.
Troubleshooting Common Faults
If your cook does not go perfectly according to plan, use this diagnostic matrix to identify the variable and correct it on your next attempt:
| The Problem | The Likely Cause | The Corrective Action |
| The glaze is black and smells bitter. | The glaze was applied too early in the cook cycle, or the air fryer temperature was too high during Stage 2. | Ensure you only apply the glaze during the final 4 minutes of cooking, and confirm you dropped the temperature to $180^\circ\text{C}$ ($350^\circ\text{F}$) for the final stretch. |
| The chicken skin is rubbery beneath the glaze. | The chicken was not dried properly before seasoning, or the thighs were cooked skin-side down for the entire duration. | Ensure you pat the chicken dry with paper towels until bone-dry. Always start skin-side down, then flip to skin-side up at the halfway mark so the fan hits the skin directly. |
| The glaze is running straight off the chicken into the pan. | The glaze was too watery, or the chicken skin lacked a textured surface for the glaze to cling to. | Ensure you include the optional 1 tablespoon of cornstarch in your dry rub—this creates a matte, crisp exterior crust that locks onto the liquid glaze. Alternatively, reduce the glaze slightly in a saucepan before brushing. |
Nutritional Profiles
Honey glazed chicken thighs provide a nutrient-dense, high-protein meal profile that fits seamlessly into balanced lifestyle plans. Using an air fryer eliminates the need for deep pan-frying oils, cutting hidden calories dramatically.
One standard serving (approximately one large bone-in chicken thigh with glaze) delivers roughly:
- Calories: 310 kcal
- Protein: 24g (Crucial for muscle synthesis, cellular repair, and maintaining an elevated metabolic rate)
- Carbohydrates: 16g (Driven entirely by the natural sugars in the honey glaze)
- Total Fat: 14g (Balanced between monounsaturated and polyunsaturated fats, highly efficient for hormone regulation)
- Sodium: 420mg (Maintained at a moderate level by utilizing low-sodium soy sauce)
- Micronutrients: Excellent amounts of Zinc, Iron, Vitamin $B_6$, and Selenium.
Storage, Reheating, and Meal Prep
Storing Leftovers Safely
If you have leftover chicken, allow it to cool down to room temperature for roughly 20 to 30 minutes. Do not leave cooked chicken at room temperature for more than 2 hours to prevent bacterial colonization. Transfer the chicken pieces into a shallow, airtight glass container. Pour any remaining pan juices over the top to keep the meat hydrated. Store in the refrigerator for up to 4 days.
The Reheating Protocol (Preserving the Glaze Texture)
Never use a microwave to reheat glazed chicken. The microwave vibrates water molecules rapidly, causing the internal moisture to steam outward, which transforms the crisp, lacquered honey skin into a soggy, wet mess.
To perfectly restore the original texture of your honey glazed chicken, use your air fryer:
- Remove the leftover chicken from the refrigerator and let it sit on the counter for 10 minutes to take the chill off.
- Preheat your air fryer to $175^\circ\text{C}$ ($350^\circ\text{F}$).
- Place the chicken thighs inside the basket in a single layer.
- Air-fry for 5 to 6 minutes, flipping once at the halfway mark. The convection air will re-crystallize the sugars in the honey glaze, crisping the skin back up while gently warming the center of the meat without drying it out.